Showing posts with label Sharepoint 2013. Show all posts

Wednesday, March 26, 2014

SharePoint 2013 – Not able to see “Audit log reports” link in Site settings

In one of my previous article I have explained how to configure audit log reports in SharePoint environment. I got few comments that they are not able to see the “Audit log reports” link in site settings

By activating reporting feature we can add “Audit log reports” link to site settings. We can add “Audit log reports” link in site settings by using following steps

Navigate to SharePoint site settings page and click on Manage Site collection features in Site Administration section


Check for Reporting feature. Click on activate button to activate the feature.


Now we can Audit log reports link in Site Collection Administration section as shown below.


Tuesday, March 18, 2014

Upgrade SharePoint 2010 classic mode web application to SharePoint 2013 claims mode using PowerShell commands

While working with SharePoint 2010 to 2013 migration I have to migrate SharePoint 2010 classic mode 2013 claims mode because we don’t have classic mode in SharePoint 2013. To do that I have upgraded SharePoint 2010 site to use claims mode authentication using PowerShell commands and restored the DB in SP 2013 server.

Now I ran: Test-SPContentDatabase” command to check the upgrade status. I got an error saying that there is inconsistency between the authentication modes. So I have reverted the claims mode authentication web app to classic mode and created a Web application in SharePoint 2013 using classic mode using following command

New-SPWebApplication -Name "Web application name" -ApplicationPool " Web application AppPool" -AuthenticationMethod "NTLM" -ApplicationPoolAccount (Get-SPManagedAccount "Application Pool account") -Port Port Number -URL "URL of the web application"

Now I took the classic mode SP 2010 web application backup and restored in SP 2013 web application. By running “Test-SPContentDatabase” command I got no issues. Now mount the database using “Mount-SPContentDatabase” command

Mount-SPContentDatabase ContentDB Name -DatabaseServer DBServerName -WebApplication Web Application URL

Finally we have to convert the web application from classic mode to claimant mode by using “Convert-SPWebApplication” command

Convert-SPWebApplication -Identity "WebApp URL" -To Claims –RetainPermissions -Force

Monday, March 17, 2014

Update UserProfile properties in using SPServices in SharePoint

I got a requirement to update the User Profile properties for one of my client. We have only option to do that using SPServices because they are not allowing any server side code. In SPServices we can directly update the user profile services using “ModifyUserPropertyByAccountName” method. By passing current logged-in user account to the method we can update the user profile properties using SPServices. I have found the following code from here (http://azzu-sheikh.blogspot.in/2014/01/update-user-profile-property-through.html)to update the user profile service.

function updateUserProfileProperty(currentLoggedInUser, propertyName, propertyValue) {
   var propertyData = "<PropertyData>" +
  "<IsPrivacyChanged>false</IsPrivacyChanged>" +
  "<IsValueChanged>true</IsValueChanged>" +
  "<Name>" + propertyName + "</Name>" +
  "<Privacy>NotSet</Privacy>" +
  "<Values><ValueData><Value xsi:type=\"xsd:string\">" + propertyValue + "</Value></ValueData></Values>" +
  "</PropertyData>";

   $().SPServices({
       operation: "ModifyUserPropertyByAccountName",
       async: false,
       webURL: "/",
       accountName: currentLoggedInUser,
       newData: propertyData,
       completefunc: function (xData, Status) {
           var result = $(xData.responseXML);
           if (Status == "success") {
              //do update action
           }
       }
   });
}


We can change the user property details by getting property data in to the method and passing the current logged-in user account details as shown the code above.

Friday, March 14, 2014

Change SharePoint site time format


In SharePoint calendar by default we can see the view as Day/week in 12 hour format, not in 24 hour format. We can to change the format from 12 hour to 24 hour through UI or using PowerShell commands.

We can change that through UI by following steps,

Navigate to SharePoint Site settings page and in Site Administration section click on “Regional settings” link


In Time format drop down select 24 hour format. Click on ok to save the settings.


We can change the format using following Powershell commands,

$site = Get-SPSite <SiteCollectionURL>
$web = $site.OpenWeb()
$web.RegionalSettings.Time24=$True
$web.RegionalSettings.FirstDayOfWeek=1
$web.Update()
$web.Dispose()
$site.Dispose()


Wednesday, March 12, 2014

Check current logged-in user having permissions to specific group in SharePoint SPServices

We can check the groups for current logged-in user from SPServices code using “GetGroupCollectionFromUser” opration. Before the we have to download and add folowing files. Javascript 1.7.1.js and JQuery.SpServices-0.7.1a.min.js

Following script will used to get the user group details

$().SPServices({
operation: "GetGroupCollectionFromUser",
userLoginName: $().SPServices.SPGetCurrentUser(),
async: false,
completefunc: function (xData, Status) {
var count = 0;
$(xData.responseXML).find("Group").each(function () {
if ($(this).attr("Name") == "Group Name") 
count++; 
}
 }); 
if (count == 0) {
// do some action
}
else {
// do some action
}
}
});

Tuesday, March 11, 2014

Change default home/welcome page in SharePoint site using PowerShell commands

We can change SharePoint default home page in different ways as using Site settings if publishing feature already enabled, SharePoint object model code, Using SharePoint designer and PowerShell commands.
We can change the home page by running following PowerShell commands,

Get the Site details by using Get-SPSite command and web by using OpenWeb() method.

$objSite = Get-SPSite SiteURL
$objWeb = $objSite.OpenWeb(“Sub site”)

Get the root folder for the web by using RootFolder property

$rootFolder = $objWeb.RootFolder

Change the home page by assigning Welcomepage property as shown below

$rootFolder.Welcomepage = “SitePages/SureshHomePage.aspx
$rootFolder.update()

After updating the page, we have to dispose the site and web objects because that objects are created newly.

$objWeb.dispose()
$objSite.dispose()

By combing the all the commands we can see the script as

$objSite = Get-SPSite SiteURL
$objWeb = $objSite.OpenWeb(“Sub site”)
$rootFolder = $objWeb.RootFolder
$rootFolder.Welcomepage = “SitePages/SureshHomePage.aspx
$rootFolder.update()
$objWeb.dispose()
$objSite.dispose() 

Sunday, March 9, 2014

SharePoint content search web part – Show items sorted by Modified date

Working with SharePoint 2013, I got a requirement from client to implement a search query web part. We have to display the items depending on the modified date. Everything in my content search web part is working as expected. But I am unable to see items modified today.

I have started full crawl again but results are not showing as expected. By checking the Content Search Web part settings, in sorting section we can see the field for date modified as “lastModifiedTime” applied the search filter. I got same results as earlier.

After digging into deep, instead of changing out of box settings, created new one in SharePoint search with Name Modified as shown image below.


Creating the search, started SharePoint full crawl and In Content Search Web part settings, changed Modified managed property.


Super, It worked for me. Now I am able to see the items in CSWP in sorting order.

Saturday, March 8, 2014

SharePoint 2013 Exception “Unknown exception occurred while executing a SharePoint solution”

In SharePoint 2013 adding Sandboxed solution I got an error as “Unknown exception occurred while executing a SharePoint solution” as shown blow.


By checking the ULS logs, I have found the following text as “An unknown exception occurred while executing a sandboxed code solution request in the worker process.\r\n|0 – userCodeWrapperType.FullName = “Microsoft.SharePoint.UserCode.SPUserCodeWebPartWrapper”

I have checked by changing the application pool identity, checked sandboxed service is running is not. But still I am getting the same error. My current running server is a standalone server with Windows Server 2012, Domain Controller, SQL Server 2012, SharePoint 2013, and Visual Studio 2012.


By digging this into deep, found that there is no fix for this issue, we have to create the new environment. By enabling verbose logging for Sandboxed code solution it will give us temporary fix but not permanent.

Sunday, February 23, 2014

Get list of all users in a site collection and get all the web parts in a page

We can get the list of all users and web parts in a page by entering the URL of the site with addition of text. We can get all the users by appending “_layouts/people.aspx?membershipGroupId=0” text. We can get all the users in a Site collection as shown the image below. We can have settings for the list of the users.


We can see the Actions for the users as shown the image below.


We can the list of all the web parts in a page by appending “?contents=1” text to Url of the site. It will navigate to SharePoint web parts maintenance page. We can have option to close the web parts, reset and delete the web parts from the page.


Saturday, February 22, 2014

Change SharePoint top left text using powershell commands

In SharePoint 2013, UI wise a lot of changes are placed. We can have top links, includes Sky drives, news feed, Sites etc in right side and SharePoint text in left side. We can change the all the text by customizing the link details.

We can change the left side text by using powershell commands. To change the text, Open SharePoint management console with admin privileges. Write command get web application by using Get-SPWebApplication command

$webApplication = Get-SPWebApplication "Web Application URL"

Get SuiteBarBrandingElementHtml and update the text by following command.

$webApp.SuiteBarBrandingElementHtml = "Suresh Pydi Blog"
$webApp.Update()


Once we update the control text we can it as shown below.


Friday, February 14, 2014

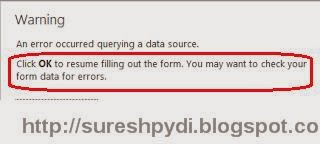
SharePoint 2013 InfoPath form error - “A query to retrieve for data cannot be completed because this action would violate cross-domain restrictions”

While working with SharePoint 2013 InfoPath forms in cross domain, I got an error saying that, “A query to retrieve for data cannot be completed because this action would violate cross-domain restrictions”. 


We can get this error, due to cross page submissions. We can fix this issue by allowing cross domain access for InfoPath service. We can do that by the steps below,

Navigate to SharePoint Central Administration, General Application Settings page and click on Configure InfoPath Forms services link in InfoPath Form Services section.


In the Settings page, Cross-Domain Access for user For Templates section Check “Allow cross-domain data access for user form templates that use connection settings in a data connection file” and click on Ok to Save the settings.


Tuesday, January 28, 2014

Content Enrichment web service callout in SharePoint

In SharePoint 2013 search, as a developer we can add custom steps to process the content to modify the managed properties before indexing. We can do this by implementing custom web service in SharePoint to enrich the managed properties of the items that processed.

To configure the content enrichment functionality by using Power Shell commands. By Using Get-SPEnterpriseSearchContentEnrichmentConfiguration command we can get the content enrichment configuration for search service application. We can write the commands as

$searchServiceApp = Get-SPEnterpriseSearchServiceApplication
Get-SPEnterpriseSearchContentEnrichmentConfiguration –SearchApplication $searchServiceApp

To save the content enrichment configuarations to the search service application using Set-SPEnterpriseSearchContentEnrichmentConfiguration command. 

To add new content enrichment object using New-SPEnterpriseSearchContentEnrichmentConfiguration and to remove current content enrichment configuration from specific search service application using Remove-SPEnterpriseSearchContentEnrichmentConfiguaration command as shown below.

$config = New-SPEnterpriseSearchContentEnrichmentConfiguration

$searchServiceApp = Get-SPEnterpriseSearchServiceApplication
Remove-SPEnterpriseSearchContentEnrichmentConfiguration –SearchApplication $searchServiceApp

In next post I will write how to create a content enrichment web service and how to configure that service to SharePoint 2013. 

Tuesday, January 21, 2014

Configure object cache settings in SharePoint

Object cache settings can be configured in Site Collection level from SharePoint user interface. We can configure the maximum cache size in we application level on the front-end web server by placing restrictions on maximum amount of memory to all site collection cache. We can configure Object cache settings for a web application in front-end web server by using the steps below,

Navigate to IIS Manager Select the web application. Right click on the web application, Click on Explore. We can see Windows Explorer with directories


Select web.config file and open the file in any editor tool. Check for <ObjectCache tag, to change the size of the cache modifies maxSize from 100MB to required value. Save and update the file.


Thursday, January 16, 2014

Configure SharePoint 2013 document center Connection

We can use connection path to send documents to a document center or record center in SharePoint 2013. This connection will specify the web application that documents will sent from and document center or record center that to be sent to.

As a farm admin we can create the connections to copy or move the content. To create the connections we have to follow the steps below,
Navigate to SharePoint central administration General Application settings and click on “Configure Send To Connections” link in “External Service Connections” section.


In Configure Send To Connections page, Select the web application field that hosts the documents to sent. In Tenant Settings section, check “Allow sites to send to connections outside their tenancy” check box to allow tenants in to send content to other tenants.
Select “New Connection” in Send To Connections list


Enter Display Name field for the connection name, Send to URL filed to enter the URL to the content organizer for the destination site. Click on Click here to test link to test the connection. To display the connection in list Select “Allow manual submission from the Send To menu”.


In “Send To action” dropdown list, We have three options, Copy, Move, Move and Leave a Link. Select Copy to copy the document and send to destination. Select Move to delete the document in current location after copying. Select Move and Leave a link to delete the document from current location and add a link on current location referring to the document. We have to specify the information in expansion dialog box for audit logging when user sends this document by using current connection. Click on Add Connection button to create the connection.


Wednesday, January 15, 2014

Create SharePoint 2013 custom search engine in Chrome

We can add search center for SharePoint site in google chrome as regular google search for SharePoint site. Here we are just creating a custom search engine by passing SharePoint search site Url as shown below.

Navigate to google chrome and right click on the address bar, Select “Edit search engines” option


In “Search Engine” dialog box, other search engine division we have to fill Search Engine Name, Keyword, Url. Google chrome will use default site domain name . In keyword section enter SharePoint Search for easy understanding. In URL, enter the search URL and assign “%S” at the end. Click on Done button to save the search engine settings.


To search the details, write, “SharePointSearch” in browser address bar and press tab to enter the search query. Here I am entering Suresh and result will display as the images.


Monday, January 6, 2014

Create custom profile property in SharePoint user profile programmatically

While working on user profile service I got the requirement to create custom property through coding for one of my client. I have found the solution to create custom property from Ahmedmandany blog. To create the property, we have to get the current service context  by passing the site object. From the service context object create new UserProfileConfigManager object. By using UserProfileConfiguaration object we can get the CoreProperties in the service as shown the code below.

SPServiceContext currentServiceContext = SPServiceContext.GetContext(SiteCollection);
    
//Here SiteCollection is SPSite object for current site

UserProfileConfigManager userProfileConfigManager = new UserProfileConfigManager(currentServiceContext);

CorePropertyManager usreProfileCoreProperties = userProfileConfigManager.ProfilePropertyManager.GetCoreProperties();

Create profileProperty list and with string type objects. Insert data into the list as shown below,

List<string> myCustomProperties = new List<string>();
myCustomProperties.Add("My Custom Property");

We can get the ProfilePropertyManager object from ProfileConfigManager. 

ProfilePropertyManager propertyManager = profileConfigManager.ProfilePropertyManager;

Check the property is exits or not in CoreProperties. If not exists, add property to the core properties. Add PropertyInstance, ProfileTypeProperty and ProfileSubtypePropertyManager objects, update all the properties as per the requirements.

CoreProperty coreProperty = coreProperties.Create(false);
coreProperty.Name = profileProperty.Replace(" ", string.Empty);
coreProperty.Type = PropertyDataType.String;
coreProperty.Length = 4000;
coreProperty.DisplayName = "My Custom Property";
coreProperty.Description = "My Custom Property" ;
coreProperty.IsAlias=false;
coreProperty.Commit();
      
ProfileTypePropertyManager profileTypePropertyManager = propertyManager.GetProfileTypeProperties(ProfileType.User);
ProfileTypeProperty profileTypeProperty = profileTypePropertyManager.Create(coreProperty);
profileTypeProperty.IsVisibleOnViewer =true;
profileTypeProperty.IsVisibleOnEditor = true;
profileTypePropertyManager.Add(profileTypeProperty);
    

ProfileSubtypeManager profileSubTypeManager = ProfileSubtypeManager.Get(currentServiceContext);
ProfileSubtype profileSubtype = profileSubTypeManager.GetProfileSubtype               (ProfileSubtypeManager.GetDefaultProfileName(ProfileType.User));
ProfileSubtypePropertyManager profileSubtypePropertyManager = profileSubtype.Properties;


ProfileSubtypeProperty profileSubtypeProperty = profileSubtypePropertyManager.Create(profileTypeProperty);
profileSubtypeProperty.IsUserEditable = true;
profileSubtypePropertyManager.Add(profileSubtypeProperty);

Thursday, January 2, 2014

Print to PDF option for SharePoint 2013 documents

From SharePoint 2013 by adding OWA we can get many add-ons. Few of them are Document previewing documents on hover and print PDF etc. Document preview allows users to view the documents and read entire document.

Print PDF will allow users to print the document as in PDF. We can locate the menu and select the option to print PDF.

To locate print PDF option, navigate to library or the WebPart where we are storing the documents. Select the document and click on “…” to the right side of the document. Click on menu on the bottom right.


We have the options to download a copy and Print PDF as shown below. Select “Print to PDF” option to print document as PDF.


We can see the window with link in the office web app. Click on the link to view the pdf.


We can cancel the printing options depending on the access additional options like download or zoom. We can see this option by adding OWA features to SharePoint.

Thursday, December 26, 2013

Map crawled property to a managed property in SharePoint search

In SharePoint search, we can map crawled properties with managed properties. We can map the properties by using the steps below,

Navigate to Site settings page in SharePoint site collection and click on Search schema in Site collection Administration section.


In Site Collection Administration – Managed Properties page, enter the Managed property name in Managed property text box to search. Select the property, click on Edit/Map property option.


In Edit Managed Property page, “Mappings to crawled properties” section, select “Include Content from all crawled properties” option and click on “Add a Mapping” button.


In crawled property section dialog box, Search for a crawled property name field, enter the property name and click on “Find” button to search for the property.


We can the properties in “Select a crawled property” box. Select the properties and click on OK to save the settings.

Friday, December 20, 2013

“The maximum number of allowed sessions per user has been exceeded. This operation cannot be completed” Error in SharePoint Excel services

While working with SharePoint Excel chart and graphs I got an error saying that “The maximum number of allowed sessions per user has been exceeded. This operation cannot be completed” as shown the image below.


We can get this error maximum sessions limit exceeded. By increasing the Maximum Session Per user limit, we can fix this error. We can increase the Maximum Sessions Per User by using the steps below,

Navigate to Application Management page and click on Manage Service Application link in Service Applications section. 


Click on Excel Service application in the list of service applications


 In Manage Excel Services Application page, click on “Global Settings” link


In Excel Services Application Settings page, “Session Management” section, enter Maximum sessions Per User. By default it is 25.  


Thursday, December 19, 2013

Configure custom search result type in SharePoint site collection

Search result type is a rule that displays the search results in different ways. It will consist conditions that compare the search results. It also consists display template to use search results to meet the conditions.
To configure custom search result type we have to follow the steps below,
Navigate to Site Settings page, click on Search Result types in Site Collection Administration section.


Click on New Result Type to create new result type in Manage Result Types page.


We’ll navigate to Add Result Type page. In Add Result Type page Enter the name in “Give it a name” text box in General Information Section.


In Conditions section, we can specify source in “Which source should results match?” drop down. In What types of content should match? You can skip this rule to match all content” drop down allows us to specify the matched content. Here we have options to add more values by clicking on “Add Value” link.


In “Show more conditions” section, we can specify we can specify conditions for the search by specifying the values in “Which custom properties should match?” section.


In “Actions” section, “What Should these result look like” dropdown we can select display type. By checking “Optimize for frequent use” check box to appear the results frequently in search results.