Friday, July 26, 2013

Configuring automatic data refresh in SharePoint 2013 PowerPivot

After publishing the PowerPivot workbook in SharePoint, we can configure the scheduling for automatic data in workbook. To configure the data refresh we must have contribute level permissions to the workbook and must be windows domain account. Workbook must be checked-in at the time of refresh.
We must have to activate the PowerPivot Integration for Site Collection. To activate that, navigate to site collection features and search for PowerPivot Integration. We cannot find the feature if PowerPivot is not installed properly. In my previous post I have mentioned about PowerPivot installation for SharePoint.


To schedule the automatic refresh, navigate to SharePoint library that contains the workbook and Click on Manage PowerPivot Data Refresh as shown below.


Check Enable check box in schedule definition page Data Refresh section.
We have to specify the type of schedule and when we wanted to refresh the data in Schedule Details section.
In the Earliest Start Time section, we have two options. After business hours specifies the after the business hours. Default value will be 8PM. A specific time specifies the time within 15 min interval.


We have to specify the e-mail address in E-Mail Notification section to notify the data refresh failures.
Enter the account information for SharePoint PowerPivot for data refresh in workbook. Account must have contribute or higher permissions to the work book as mentioned earlier. We have three options here, to use predefined account, click on Use data refresh account configured by the administrator. Connect using following Windows user credentials option to specify the own windows account. Connect using the credentials saved in Secured Store Services (sss) to log on to the data source to run in a specified windows account that defined in Secured Store service. For this option, Admin must have the SSS ID to store the account information.


If we want to refresh all the data sources, select All data sources check box in Data Sources section to data refresh. Click on OK.

Thursday, July 25, 2013

Install PowerPivot Add-in for SharePoint 2013

PowerPivot for SharePoint collection of back and middle-tier services that allows getting PowerPivot data in SharePoint farm. If we are using Excel PowerPivot that contains the analytical data in SharePoint site, we must have to use PowerPivot services in server.
PowerPivot for SharePoint 2013 is an installation package called spPowerpivot.msi that deploys the PowerPivot for SharePoint 2013 files. We can download the .msi file from http://www.microsoft.com/en-us/download/details.aspx?id=35577 URL.

After downloading the .msi file, Right click on it and select install command. We can see the see the screen that checks the machine for all installations.


After completing with checking machine installations, We can see the screen with default option selected as shown the image below. Click on OK button.


We can see the following screen for inputs. Here we have to pass Default Account Username, Password to provision the services and PowerPivot service application pool. We have to specify a custom account instead of built-in account. If we provide the built-in accounts, tool will blocks the configurations. Database Server is the server name. We have to specify the Passphrase, which will be useful whenever new servers are added to the farm and PowerPivot Server for Excel Services value like ServerName/PowerPivot.


After entering the values click on Validate button to validate the inputs.


Once we are done with successful validations, Click on Run button. We can see the warning alert says “Configuration settings will be flagged...” click on Yes button.


PowerPivot for SharePoint will install. We can see installation successful message after completion of installation.


We can check PowerPivot installation by checking following things,
Services in SharePoint central Admin (Application Management -> Manage Service Application -> New). SQL Server PowerPivot service Application in the list or not.


Services list (Application Management -> Manage Services in the Server), check for SQL Server PowerPivot System Service is there or not.


Farm features (System Settings -> Manage farm features), check for PowerPivot Integration Feature.


Wednesday, July 24, 2013

“An error occurred during an attempt to establish connection to external data source…” error in SharePoint Excel service PivotTable manual refresh

In SharePoint server 2013, to refresh the data manually in PivotTables need to go for Data -> Refresh All Connections as shown in the image below.


While refreshing data I got an error like “An error occurred during an attempt to establish connection to external data source…” 


After checking the error in Logs I have find that the issue with identity currently set. When we access to refresh the data in PivotTables Claims to windows token service (C2WTS) will be used. If C2WTS is running with domain account that domain account needs permissions on the SharePoint server where it is running.

C2WTS domain account must be in SharePoint server’s local administration group where it is running and it has to impersonate the client after the authentication, Works to log an as service and it needs to be act as part of the operating system.

To access the local security policy of the server, Go to Administrative Tools -> Local Security Policy -> Local Policies -> User Rights Assignments


By adding the permissions to the account that running Claims to windows token service, we need to restart the service on each server it is running. 

Tuesday, July 16, 2013

Add charts to SharePoint site using excel services

By using SharePoint excel services we can show excel worksheets, graphs and charts in the SharePoint site. We can create the charts and graphs by using excel power pivot. To create a chart in excel workbook, take an excel workbook with sample data to create a chart.


Select Insert tab on the top, select Power Pivot button on the top left as shown below.


We can see a window asking to create a Pivot Table. Click on OK button.


Name the Pivot table.


Select the fields to create power pivot report and drag the fields in to Sum values column and Rows column to create a report.


Once done with the report, Select Insert tab and click on the charts to insert the pie chart in excel sheet.


After creating the chart, Name the Chart. Here it is “Chart 1”  


Save the excel sheet and upload it to SharePoint library.


Add Excel Web Access web part in the SharePoint page to show the chart.


Click on the link “Click here to open the tool pane” to specify the worksheet and chart details to the web part.


Add Excel worksheet in Workbook and Chart Name in Named Item in the Workbook display settings of the Excel Web Access web part.


Click on “Apply” button. We can see the Chart in SharePoint page once done with applying the settings.  Click on “OK” button to save the settings. Click on Save Page to save the page.


We have the options to change the view by changing the drop down option on the right side.


Friday, July 12, 2013

Configuring Excel Services in SharePoint 2013 - II

In my earlier post, I have mentioned configuring excel services Global settings and Trusted file location. In this post we can see trusted data providers, trusted data connection libraries, user defined function assemblies and data model settings.

Trusted data providers works as data providers for excel services to access the data. A data provider is a protocol that combined with database type for accessing data. By default excel services will not access data without trusted data providers. Excel services will contain the data providers as entries. We have to add additional data providers as per our requirement.

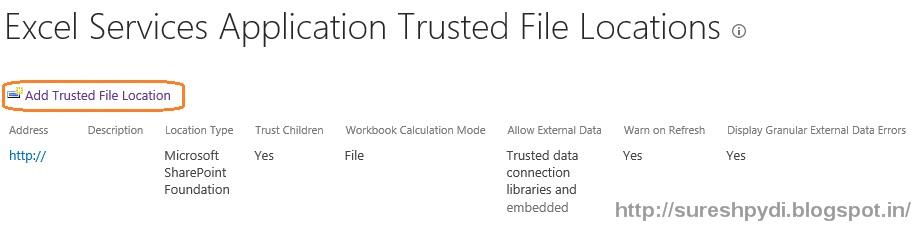
By clicking on the trusted data providers link in Manage Excel Service Application Page, we will navigate to Excel Services Application Trusted Data Providers page. We can see a list of trusted data providers from excel service. To add new data provider, click on “Add Trusted Data Provider” link on the top of the page.


On the Excel Service Application Add Trusted Data Provider page, Provider section, we need to add the provider ID in Provider ID text box. In the Provider Type, we have to select the one of the following options, OLE DB, ODBC, ODBC DSN. OLE DB option will access the data by using Object Linking and Embedding. By selecting ODBC option, data will be accessed using Open Database Connectivity. By selecting the ODBC DSN, data will be accessed using Open Database Connectivity with Data Source Name.


To Configure trusted data connection libraries for excel services click on Trusted Data Connection Libraries in Manage Excel Service Applications page. Trusted data connection libraries are the data connection libraries for trust configuration in SharePoint 2013 excel services. All the Data connections for excel services will stored in trusted data connection library.


To create new trusted data connection in SharePoint 2013 excel, Click on Add Trusted Data Connection Library in Excel Service Application Trusted data Connection Libraries page.
We will navigate to Excel Service Application Add Trusted Data Connection Library page. In the Location section, we need to enter the document library URL that permit to access the excel service application. We have to add the description of the trusted data connection in the description text box.


To add the User defined assemblies for the excel service, click on User Defined Function Assemblies link in Manage Excel Services Application page. Click on Add User-Defined Function Assembly button on the page to add new User-Defined Assembly.


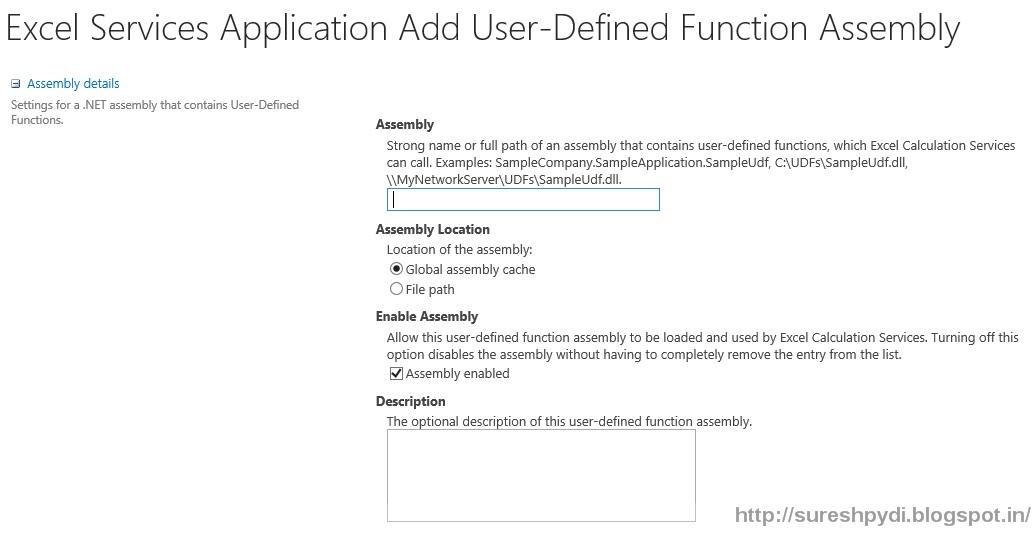
In the Excel Service Application Add User-Defined Function Assembly page, Assembly details section, enter the Assembly strong name or path of the assembly contains the user-defined function. Depending on the Assembly type you have entered, select the option Global Assembly Cache or File path. Check Assembly enabled check box to allow the user-defined function assembly to be located and used by Excel calculation service. Unchecking this option, disables the option assembly will not be added for user defined function.


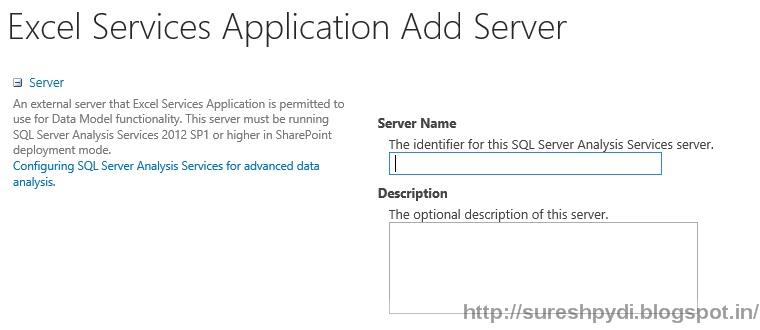
In SharePoint 2013 Excel Services, We can specify the SQL server instances for Analysis services to process the data models. This will provides the backend services for Excel service to load query and refresh the data model. To add the instance of the SSAS, we must have to install the Power Pivot for SharePoint mode. We can add new data model in SharePoint excel service in Excel Services Application Data Model Settings page. By clicking on the Add Server button, we will navigate to Excel Services Application Add Server page to add new data model.


In the Excel Services Application Add Server page, Server section, we have to enter the instance of SQL Server 2012 SP1 Analysis Services (SSAS) Server Name to add the new data model. Description is optional that helps to describe the data model setting.


We can deploy the excel services in three scenarios, Enterprise, Medium or small department and custom. While configuring the enterprise scenario we have to check that, don’t configure support for User defined functions, do not enable workbooks to use embedded data connections or direct access of external data. Need to limit the usage of data connection libraries from external Data source access. For small department deployment, we have to enable the trust for all the locations using the department members. Need to enable the trust children option for all the trusted sites and directories. If any chance to get problems from a file location, just restrict the access. In custom deployment, enable the excel services to open the large work books, we need to configure the long session time-out and large data caches that there is change to delay in the connection. Here we don’t enable the trusted child for trusted location and need to create a single trusted location. 

Configuring Excel Services in SharePoint 2013

In my previous post, I have explained how to create excel service. In this post we can see how to Manage the excel service application. By navigating to manage excel service application page, we can see six links, allows us to manage the service application.


By clicking on the Global Settings link, we will be redirected in to Excel Service Application settings page. This includes settings for Security, Load Balancing, External Data, Memory utilization and Workbook cache.

Security settings will gives the options for excel service application authentication, communication and service settings. File Access method for excel services will have two options Impersonation and Process account. Impersonation enables a thread to run in a security context that owns the thread. We need to select the Impersonation, when workbooks are stored in http locations. Process account option need to be used when excel services opens the work books from HTTP sites. In the Connection Encryption section, we need to use Internet Protocol Security or Secured Sockets Layers (SSL) to encrypt the data transmission. There no need of connection encryption by default. But if we choose the require connection encryption option, excel service application server enable data transmission between the client computer and front-end web servers.


Load Balancing settings allows us to maintain the sessions across the excel calculation 
services process.


Session Management settings allow us to set maximum number of sessions allowed per user.


Memory Utilization settings will gives the options to allocate the memory on the excel services.


By using Workbook cache settings, we can set the caching workbook files on the disk and in memory.


Through external data settings, we can handle the external data connections in excel calculation services.


Trusted File Locations” in Excel services, trusts the entire SharePoint farm. In SharePoint, by default we have a trusted file location (http://) enables any file to be loaded from SharePoint server farm or stand-alone deployment. By trusting the whole SharePoint farm enables the easier setup for the administrators. For security purpose we can create new trusted file locations. Trusted file locations may be SharePoint sites or http sites that running the excel services that allows accessing workbooks.To add the new trusted location, Click on the “Trusted Locations” link, we can see Excel Services Application Trusted File Location page. Click on “Add Trusted File Location” link on the top of the page.


In the Address text box, we need to specify the location of the excel documents that excel services trust. We have to specify the type of the address in the location type like SharePoint or network file share or HTTP. If we want to trust the all children for that location, check Children Trusted in the Trust Children section.


In the Session Management settings section Session Timeout field specifies the maximum time that excel calculation service open/active. We can measure the session timeout that request time to reach start to end. The default session tome out is 300 sec. Short session timeout specifies the maximum time that excel web access service open/active. This is similar to session time-out setting. Default value is 75 sec. Maximum request duration filed specifies the maximum duration of a single request in a session.


Workbook property settings specify the behavior of the workbooks from specified trusted location in excel calculation services. Here Maximum Workbook size specifies the maximum size of the workbook that can be opened from Excel calculation service. Default value is 10 MB. Maximum chart size specifies the maximum size of the chart that can be opened by excel calculation service. Default value is 1 MB.


Calculation behavior specifies the modes of calculation in excel calculation service. Volatile Function Cache Lifetime field specifies the value for maximum time that computed value for automatic recalculation cache. Default value is 300 seconds. Workbook Calculation mode specifies calculation mode of workbooks in excel calculation service.  Manual, Automatic and Automatic except data table’s settings will override the settings. Default value is File.


External data services specifies how excel calculation services should handle external data connections in workbooks from trusted locations. Allow external data field specifies the external data processing. To disable the external data connection, we have to select radio button None. Trusted data connection libraries or trusted data connections libraries and embedded will allow the connections embedded with trusted location workbooks. Refresh warning enabled will display the warning message before refreshing the external data in workbooks from trusted locations. Default is enabled. Stopping open enabled to stop the open operation on a file from trusted location when the file contains the refresh. Default value is enabled. Automatic refresh (periodic/on-open) specifies automatic refresh duration period. Default value is 300. Manual Refresh field specifies the manual refresh duration. Default value is 300. Maximum Concurrent Queries per Session specifies the value for the number of eastern queries can execute in a session concurrently. Default value is 5.


User-defined functions allowed in the User-defined functions section, allows permitting user-defined functions to call from workbooks from trusted location. Default value is disallowed.